Menu

DILUTION CHART

BACK TO TOP


Dilution Ration
1 to 4
1 to 5
1 to 10
1 to 12
1 to 15
1 to 20
1 to 32
1 to 40
1 to 50
1 to 60
1 to 64
1 to 100
1 to 128
1 to 256
Oz. Per Gal
32
26
12
10
8
6
4
3
2 1/2
2
2
1
1
1/2

To Determine

Cost To Use:

Divide dilution into cost per gallon

Examples:

  1. 1: 256 dilution selling at
    $12.30 per gallon:
    $12.30 / 257 = .048 or
    4.8¢ per gallon
  2. 1:10 dilution selling at $4.00
    per gallon: $4.00 / 11 = .36
    per dilute gal.
Ounces Per Gallon:

Divide dilution ratio into 128

Examples:

  1. 1:85 dilution
    128 / 85 = 1.5
    Answer = 1.5 ounces per gal.
Dilution Ratio:

Divide ounces per gallon into 128

Example:

  1. 1 1/2 oz, per gallon dilution
    128 / 1.5 = 85
    answer = 1:85 dilution ratio

Note:
It is necessary to first convert
dilution to ounces for one gallon.

Example: Dilution is 10 ounces
per 5 gallons. Divide 10 by 5
(10/5 = 2) Answer: two ounces
per gallon. Now divide the ounces
per gallon into 128 (128 / 2 = 64).
Answer: use dilution is 1:64.

Parts Per Million (P.P.M.) Of
Active Disinfectant In Various
Use-Dilution Ratios:

Multiply percentage of active
disinfectant times 10,000, and divide by use - dilution rate

% active x 10,000
dilution rate

Examples:

Given active percentage if 4.5%.

  1. At 1:256 (1/2 oz. per gallon)
    (4.5 x 10,000) / 256 = 176
    ppm active
  2. At 1:128 (1 oz. per gallon)
    (4.5 x 10,000) / 128 = 352
    ppm active

U.S. Volume Equivalents

One Gallon
4 quarts
8 pints
16 cups
128 ounces

One Cup
8 ounces
One Tablespoon
3 teaspoons

One Pint
2 cups
16 ounces

One Ounce
2 tablespoons
6 teaspoons
One Quart
2 pints
4 cups
32 ounces

Metric Volume Equivalents

3 teaspoons =
8 tablespoons =
16 tablespoons =
1 fluid ounce =
8 fluid ounces =
16 fluid ounces =
32 fluid ounces =
128 fluid ounces =

1 tablespoon
1/2 cup
1 cup
2 tablespoons
1 cup
2 cups or 1 pint
4 cups or 1 quart
1 gallon

= 15 ml
= 118 ml
= 237 ml
= 30 ml
= 237 ml
= 473 ml
= 946 ml
= 3.8 liters

Temperature Conversions

°F = 9/5 (°C) + 32
°C = 5/9 (°F-32)


CARPET SPOT AND STAIN REMOVAL

BACK TO TOP

KEY:

1. Dry Solvent
2. All Purpose Spotter

3. Brown-Ex Tannin
4. Odor-Ex Tannin
5. Gum Remover
6. Rinse Water

Stain

Use First

Use Second

Use Third

Beer

2

6

Berry Stains

2

3

6

Blood

6

2 & 4

6

Butter & Fats

1

2

6

Chewing Gum

5

1

6

Chocolate

2

3

6

Coffee

2

3

6

Cosmetics

1

2

6

Crayon

1

5

6

Cream

2

6

Eggs

2

4

6

Fruit & Juices

2

3

6

Furniture Polish

1

6

Glue

1

6

Gravy

2

4

6

Grease

1

6

Ice Cream

2

6

Inks

1

2

6

Ketchup

2

6

Lipstick

1

2

6

Liquor

2

6

Mayonnaise

2

4

6

Milk

2

4

6

Mustard

2

3

6

Nail Polish

1

6

Odors

4

2

6

Oil

1

6

Paint

1

2

6

Salad Dressing

2

6

Shoe Polish

1

6

Soda

2

3

6

Tar

1

5

6

Tea

2

3

6

Unknown

1

2

6

Urine

2

4

6

Vomit

2

4

6

Wax

1

5

6

Wine

2

3

6


FLOOR CARE TROUBLESHOOTING GUIDE

BACK TO TOP


Floor Care Troubleshooting Guide

Most floor care problems are caused by improper product use. This
quick reference guide will help identify problems, causes and solutions.

Problem: Finish is too sticky or tacky.

Cause Solution
Finish is applied too thick Apply thin coats and allow each to
dry before applying the next coat.
Not enough drying time between
coats.
Under normal conditions finishes
dry in 20-30 minutes. High humidity
extends drying time.
Restorer not properly diluted or
applied too frequently.
Follow label instructions. Under-
diluting or overuse can leave a
sticky residue.
Restorer / maintainer not burnished
soon enough after application.
When dry, restorer/maintainer will
continue to soften finish if not
burnished.
Floor not properly rinsed before
application of finish.
Thoroughly rinse and neutralize
floor after stripping. Use neutral
cleaner in proper dilution.
Improper use of disinfectants. Measure carefully and follow label
directions.
Separation of finish. Finish may have been exposed to
prolonged heat causing separation
in the product. Shake or stir before
using.

Problem: Finish swirls or scratches

Cause Solution
Pad is too aggressive. Use the recommended pad for a
particular task whether it be
burnishing or cleaning.
Pad is dirty. Clean with a wire brush or put pad
in deep sink and spray off the build-
up. Hang up to dry.
Floor is dirty or sandy. Use walk-off mats; dust thoroughly
before burnishing.


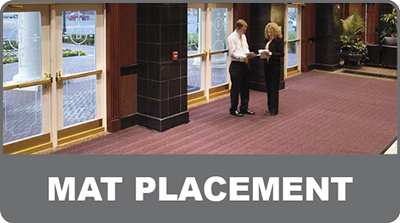
EFFECTIVE MAT PLACEMENT

BACK TO TOP

Effective Mat Placement is Essential For Effective Dust Control

When planning a mat program, high traffic areas as well as specialized applications should be pinpointed. Strategic placement is essential for maximum effectiveness. Properly placed mats can stop 70% to 80% of dirt and grime that would otherwise be tracked into a building.

Entrance Mats -
Absorbent carpet face removes dirt and moisture. These are made for indoor use and should be used along with scraper mats as part of a dirt and dust removal system.

Scraper Mats -
Tough and abrasive, scraper mats are designed to aggressively remove dirt, mud, grime and snow. All scraper mat designs allow easy removal of accumulated dirt and moisture. Can be used indoors or out and should be placed in front of a carpet mat to maximize its performance potential.

Anti-Fatigue/Protective Mats -
Specially designed to promote safety and worker comfort. These mats are ideal near workstations, assembly areas and computer terminals.

Specialty Mats -
These mats include kitchen, protective, message and logo mats. A broad range of benefits are provided by these categories including image enhancement, slip reduction, and floor protection. Perfect for a large number of niche applications from industrial to retail.


Clean Cut Solutions  •   40 Messina Drive #4  •   Braintree, MA 02184

Phone: 781-352-4707

Copyright © Clean Cut Solutions - All rights reserved.

This Website Developed & Hosted By:

Hosted on Servers Powered by Wind Energy: